
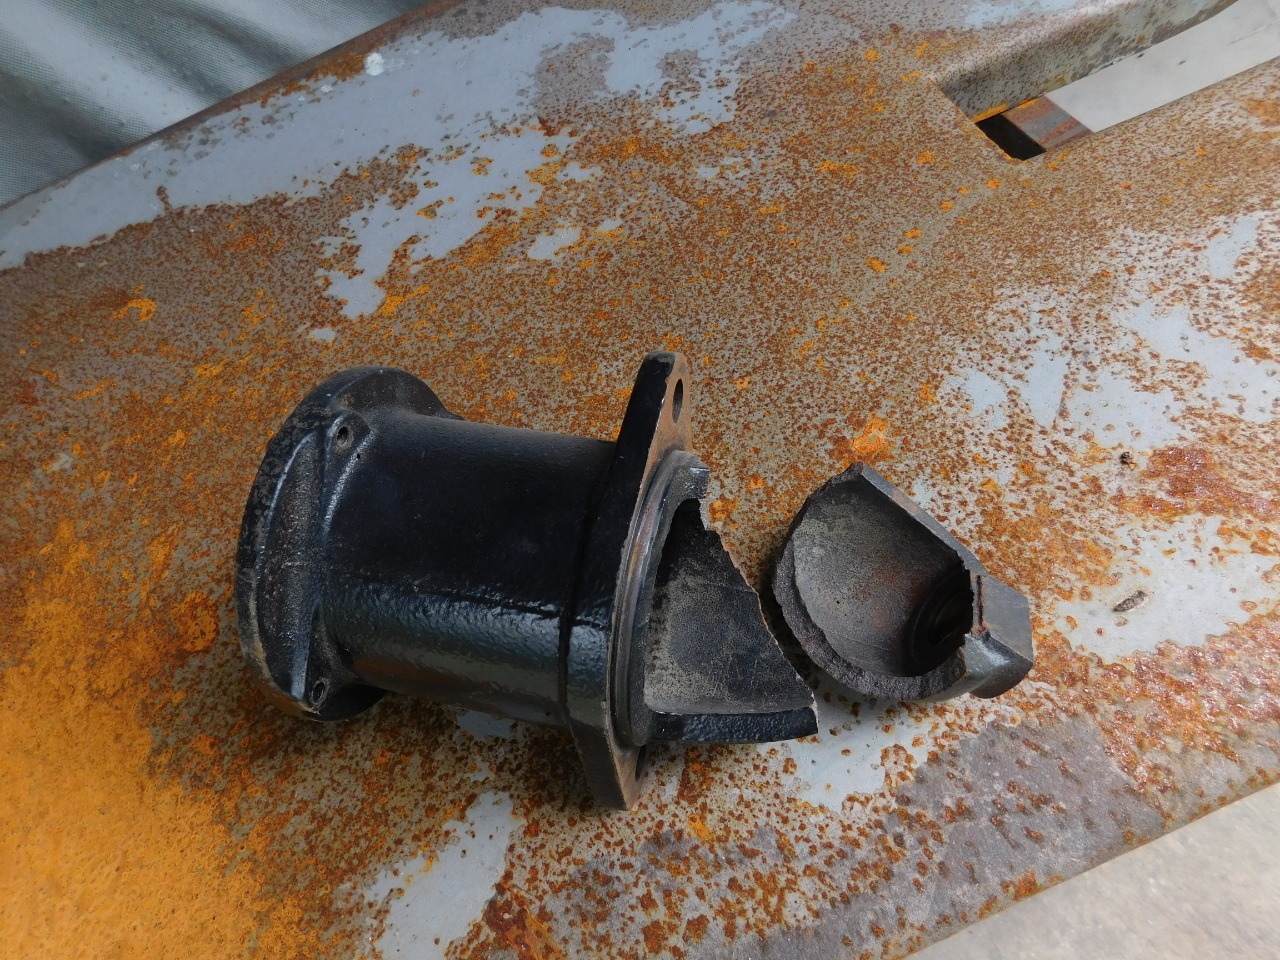
As per Kerry's picture, this is what can happen when the 6V hydro starter is used on 12V without converting to 12v. The standard shift starter operates differently than the hydro. The stick starter pulls the Bendix towards the starter and engages into the ring gear and the hydro pushes the Bendix out, thus busting the nose cone off. As pointed out, twice the voltage, twice the power,....
NOW someone tells me!
Actually the car was converted before I bought it. 🙂
The picture I posted yesterday shows the crack in [u]exactly[/u] the same place. Those of you who are still running 6v starters on 12v, better change them over. And remove and inspect the starter to see if the crack has already started forming.
Otherwise you’ll be joining this discussion!
Ok, time to update this thread. I ordered the modern 12V starter from Terry at SNAP Rebuilders in Salt Lake City. I installed it and tried starting but I was getting a nasty rattling sound when cranking the engine. Since I was expecting to install the new starter and be done with it, I didn’t have time to troubleshoot the noise, so I let it sit for a month while I was doing other projects. However I thought about it off and on, and I hand-cranked the engine through a full revolution to inspect the ring gear for damage, looking through the hole in which the starter mounts. Some of the teeth were chipped but none of the teeth were broken off. Something in the back of my mind told me to look at the bendix gear on the old (broken) starter.
Guess what? It was missing. Apparently, when the nose casting of the old starter broke off, the bendix gear came off with it and fell down inside the torque converter housing, and that was what was rattling around as I cranked the engine. I put off removing the covers under the torque converter because I had other things scheduled, but got back to it the other day. When I removed the covers, the broken bits of the bendix gear fell out. It had gotten broken into pieces by the rotating ring gear and/or torque converter. After I put it back together and cranked the engine, the noise was gone and the starter operated perfectly.
Some notes about how to do this upgrade, and I do consider it an upgrade because I used a modern starter from GM, modified by SNAP to work in our application, and it is much more compact, lighter, and dependable.
First, the new starter comes with an adjustable collar that mounts the starter to the engine block. The collar has a series of holes drilled in it, with two Allen screws, that allow you to “clock” the orientation of the starter to the block. You will need to do this to get the starter to fit in the space between the engine block and the steering arm. See the pics I attached for the correct adjustment.
Second, you have several options for how to wire the new starter. I chose the simplest method in order to get the job done quickly. This retains the operation of the high-amp relay on the inner fender to energize the starter. However, a better method is to run the positive cable from the battery directly to the new starter, and connect the starting circuit wire to the solenoid that is built into the new starter, GM style. I will do this eventually, but I need to buy a longer positive cable first and extend the starting circuit wire to the starter solenoid.
I strongly endorse Terry at SNAP Rebuilders and this modern 12V starter. If you are changing from 6V to 12V, consider this a must-do modification. If you run 12 volts through a 6 volt starter, you will eventually break it like I and several others have done. The cost was about $340 delivered, and I consider that a very fair price. Their phone number is 801-467-2902.
Also, does anyone want the broken starter? You can have it for free if you come get it, or for the cost of packing and shipping.
