
My apologies Frank. After a great Western Regional Meet this past weekend, 7 hr. drive home, a few more hrs. checking emails, O'forum and HET forum posts I overlooked your Gallery. By then it was 1 AM, my mouse trigger finger was tired and went to sleep.
I checked the Gallery today. It was the only heading I had not checked last night. A lot of information and pictures. I was at the meet you talked about your filtration system but was not aware you were now producing them.
Thanks for posting.
Lee O'Dell
Also, my apology for getting off topic!
Lee,
I suppose it was I who first drifted off topic, but it really was related to the hydraulic lifter subject and an unpassable opportunity to plug my product.
Thanks for taking the time to look.
Frank
Hey Doug and all...
Here are some picture I took of the inside of the block when I replaced the oil pan gasket. Hopefully you all can give me some indication of wear.
Thanks,
Ray
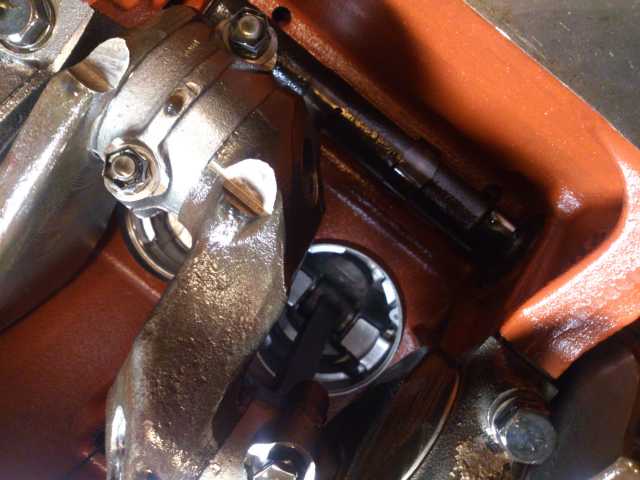
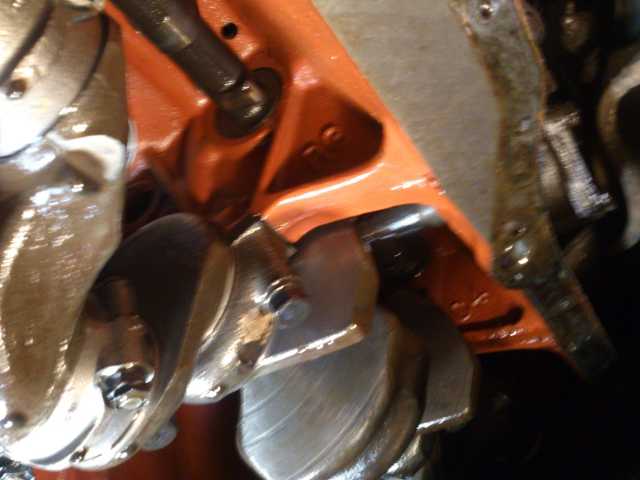
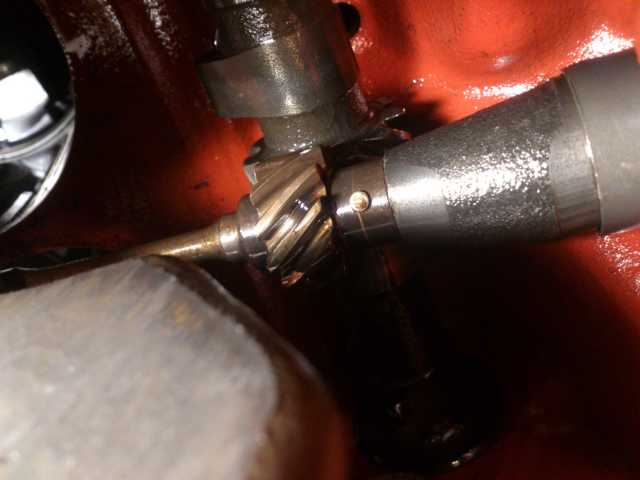
Wow Ray, most would love to see what your seeing when they removed the oil pan ! Check to see how loose the guides are ?. After looking at the inside, this doesn't appear to have many miles on it at all! Oil pump gear looks to be new, no sludge or anything in the webbing of the block. Pistons are shiny on the skirts,... I would say repair the very minimum, finish putting it together, start running it. Do the pistons have a size on top of them?.010 , .020 etc,.. Do you have a picture of them on top?.
Thanks Doug...
My gut said exactly what you have... that this engine has low miles but some age. I was just as surprised as you when I pulled the pan. Compared to the relative ugliness of the head, the internals look great!. The valve guides for the two valves I've pulled felt tight, but I have to look in the book and try to get a measurement tolerance to be sure.
The lifter I thought looked "squished" had actually thrown a keeper from the spring retainer and the spring had just extended over the top of the lifter. Went to the local napa and got a few new keepers. The one missing keeper was not in the pan or anywhere to be found.
The other lifter missing the secondary spring looks to be of a completely different design. I will throw some calipers on it once I have the top removed to pull and change the springs.
I'll take a close close look at the tops of the pistons when I get home. But if memory serves me there are no markings on the top of them. This might be ok because I thought the piston sizes (letters) were in the channel under the valve cover?
Thanks again!
Ray
Oversize markings are typically stamped into the top of new and/or aftermarket pistons. As pretty as that looks, it is either the cleanest "experienced" engine we've ever seen or it is a recent rebuild (in terms of miles) which would likely be bored to at least .020.......possibly not.
The keepers not being present in the engine anywhere tells me that the rebuilder did everything on the valve work except finish that one valve installation. Possibly that's why it wasn't run much.
F
Hey all,
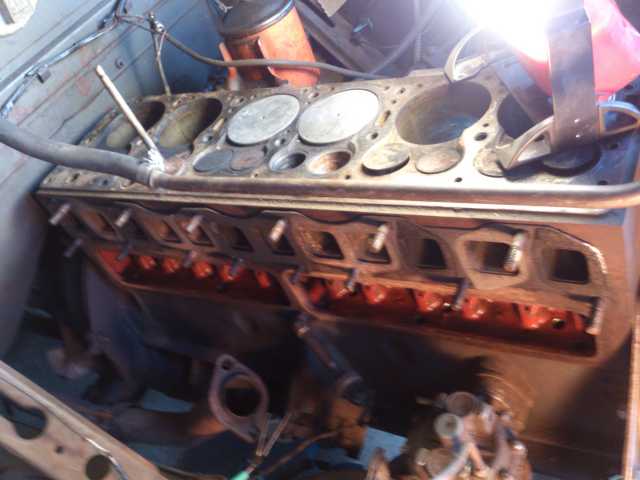
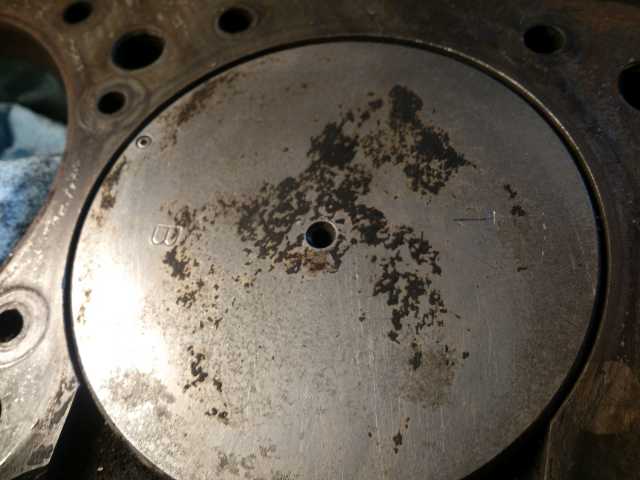
Got home and scrubbed down some of the piston heads to see any markings. Cylinder 1 had a "1" and a "B," Cylinder 3 had an "A," and Cylinder 4 also had an "A".
It seems clean inside, but the head and all up top will take some work getting cleaned out. Lots of surface rust from sitting and the bad head gasket.
Thanks all,
Ray
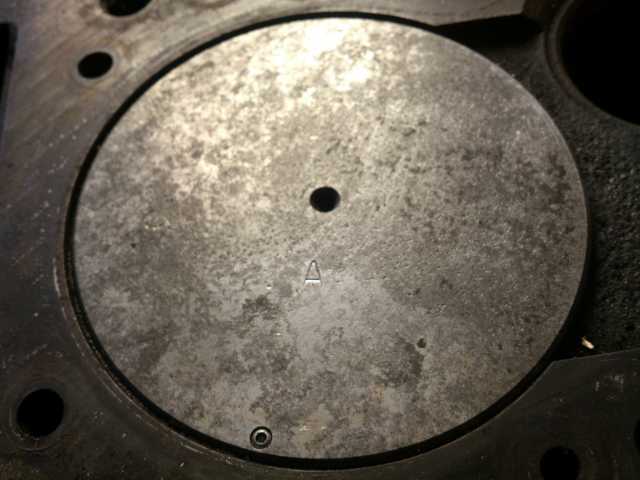
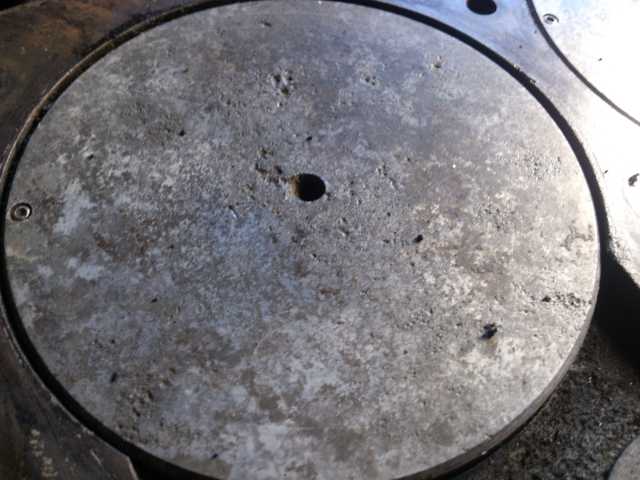
There's a 1951 shop manual in the online library that gives the following for 308 pistons:
Code letter A - (Cyl) 3.812; (Piston) 3.8095; (Ring) 3.8123
Code letter B - (Cyl) 3,8125; (Piston) 3.8095; (Ring) 3.8123
The online manual is searchable - open and type Piston Size Code in the search box
Hudsonly,
Alex B
I stand corrected.
I can't resist adding my two cents' worth. I haven't seen inside many Hudson engines - well this one and my own 3 x 5. This one's beautiful inside. Doug Wildrick said it well, and I can't add anything except to say that the interior paint may be what I understand is called "Glyptal" or similar, and those who use it think it's great. Used inside electric motors and similar. Makes oil run down to the sump, reduces glop build up inside castings. Will not turn to gold or silver or draw flies. I think it's fair to say that whoever did that overhaul that you are now debugging tried very hard to do a top-level good job. It looks so good below and so nasty up top.
Doug said fix the top, and I agree. That's worth all it cost. Resist all urges to take it all apart and go through the whole thing. It looks too good for that. Good luck.
So.... just an update. Replaced the valve springs, wire wheeled and rehonned the valves, cleaned the top of the block, got all the rust out of the intake and exhaust ports on the block. Sooo much brakekleen... soo many rags. Everything is looking nice. Brought the head in to get checked. Ugh... comes in under 1.94 in multiple spots before even leveling. Which might explain why the head gasket did let go in the spots it did. So I am in search of the appropriate 55-56 308 iron head with some meat still on the bone. Ad already posted to the want ads. Wish me luck!
Ray
Hello ray. Well, you can take a '51-'54 308 head and make it what you need by drilling the holes. Something to take note of though. Not all the holes are the same size. At least 2 of the holes are used to line up the head gasket to the block and 2 holes are used to line up the HEAD to the block-4 total. This is very important when you drill the earlier head out. I don't know if this info is out there, but if you clean all the holes in the 55-56 head, then take your factional size drill bits, start checking them, you will find this out. When standing in front of the engine, the middle bolt in the row 1 and the middle bolt in row 7 are smaller about 1/16th. Next, row 2, right outside, and row 6 ,left outside, are also about a 16th. smaller. If you take you head gasket out, place it on the block, take bolts and put in these locations. You can see it should line up much better than bolts just being put in at random. I don't know if this is designed like this?. Make sure if you drill the head, it is preferably done with a drill press that is perpendicular and will drill a straight, true hole. I have seen it done with just an electric drill, which is next to impossible to get to drill straight, and will cause improper head torque. = future problems. Good luck, hope to see that Hornet sometime soon!
Also, make sure to put oil back into the cylinders after everything is cleaned and blown out. This is good to do now, while you are solving the head issue. Turn the engine so none of the pistons are TDC, which allows plenty of fluid to stand on top. We use Dexron trans fluid. You will see the fluid slowly go down. This makes sure that when you do get it all back together, it won't be running dry on the cylinder walls.
Hey Doug...
I made a set of four alignment studs to align everything for the head install. I remembered our conversation from the crank up meet and you made a point about which side is up on the gasket. So which side to the block? Which to the head? One side the metal is thinner... the other obviously thicker.
Thanks again!
Read enough and figured it out... til tomorrow 🙂
Thanks all,
Ray
