
Doug, Very sound suggestions, Upon removal of the generator the fan blades of the generator pulley were laid down. The alignment was acceptable at that time. The shop that did the gen rebuild and I noticed that the fins would need put back to original position to have cooling effect on the generator. They has to add a spacer once that was done for the armature to be able to rotate freely. I have not changed anything else. This did position the pulley of the generator more towards the front of the engine. I suspect this was why the blades on the generator pulley were laid down flat to begin with long ago. To improve the belt alignment. From the pictures Tim has provided I can clearly see that both upper and lower generator brackets are correct. I also know the generator is correct by the stamped data plate on it. At this point I am questioning the water pump or the generator fan pulley being incorrect. I see some small differences in Tim's generator pulley and mine. Currently I have added spacers between the water pump and water pump pulley. I do not want this for a long term fix and it does create a very small gap between the fan and radiator, about 3/8 of an inch.
Tim, Thank You so very much for the pictures you have provided. I is clear now that my brackets, both upper and lower are correct. I had to increase the length of the fan to water pump bolts when adding the spacers. I want this right and am sure with your help and the other people here I will get there. My concern is something shifting even a small amount, if so I will have the fan in the radiator that I just had re-cored. I really don't see how there could be much movement of the engine or water pump shaft the fan is attached to but if it did it could be bad. About my only thought would be the bearing in the water pump going bad. I would think that would be noticed before it got that bad with careful and routine inspections.
David,
I still don't understand the problem, but frankly, from what you describe, the generator was not serviced correctly. There is no need to change what you seem to describe. I think your best bet is to find another correct generator instead of changing the rest of the configuration to work with an incorrectly repaired generator, or one put together with the wrong parts. Take the generator out and give some better pictures. We can maybe figure out what is wrong with it.
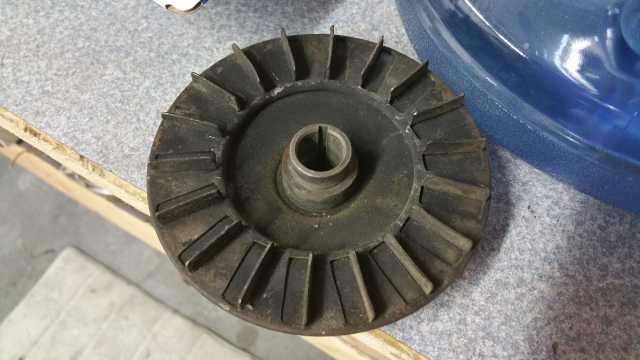
The generator on my 41 is apart. I need new bearings for it and the pulley was bent. Sounds familiar? Here's some pictures of the fan blades. Looks like 1 or 2 of those are slightly bent.


The generator on my 41 is apart. I need new bearings for it and the pulley was bent. Sounds familiar? Here's some pictures of the fan blades. Looks like 1 or 2 of those are slightly bent.

Since I really know nothing about the particulars in this case, I feel authorized to throw in my two cents worth:
The misalignment doesn't look too bad to me. I'd try it for at least a few miles.
I'd try to find an authentic Hudson pulley for this application and compare with the one you have.
Shims can accomplish great things in many applications. I'd consider experimenting with shims on the hinge bolt where it engages the mounting bracket.
Thanks for the use of the soapbox.
[quote="David Placker" post=9274]Eddie, Could you please clarify? The upper adjusting bracket on both or ours is mounted in the same location just below the water pump.
Sorry about that Dave. Flipping the pages back and forth got me mixed up. Starting all over, it appears that your water pump is slightly different. All my parts books are in long term storage so I can't check it out. If I remember correctly there are 3 or 4 different pumps, some with by-pass, some without.
