
So, I finishing the replacement of the throwout bearing and trans/OD seals and gaskets. I've never seen a clutch pilot bearing peened into place (see the three marks on the flywheel). Anyone?
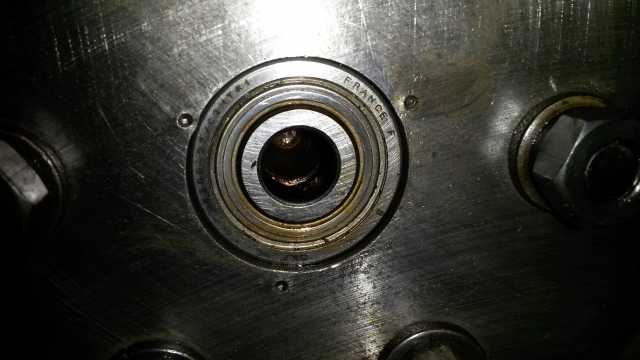
The bearing is brand SKF, a well known brand, but with a modern part number designation.
[b][u]Anyone have an idea of how to undo the peening without damage?[/u][/b]
My assessment of the sealed bearing is that it is okay based on its smooth and quiet movement, lack of any detectable play and the fact that it wasn't making any noise while in use.
I don't know when it was last addressed, but generally practice the replacement of the easy stuff when I have all the difficult parts removed.
Pat
Pat, it is driven in from the back side. If it is smooth, it will probably be fine leaving it alone. The one thing about this though, do you know if the flywheel is sealed on correctly?. This will leak if it is NOT. Now would be a good time to check if you don't know. It is the last part out, first part in kind of thing. Hope this helps, Doug
AH, OF COURSE! That absolutely helps, Doug.
I didn't realize the flywheel was open to the crank side and therefore, requires a seal. So, I also didn't know whether it has any leak.
So, I'll look into pulling the flywheel.
Thanks so much, Doug.
Pat
Pat, we use # 1 Permatex sealer. Make sure both mating surfaces are clean of any and all other material. These need to be torqued to 40-45 ft.lbs.with a known accurate torque wrench. Remember, these have a shouldered type bolt, so when removing, apply an equal amount of pry to either side of the flywheel. d
Thanks again, Doug. I understand that the bearing can be driven out the back side if the flywheel removed; however, the Hudson manual calls for use of a special tool fitted to a slide hammer to pull it out on the clutch side.
Do you normally peen the bearing to keep it snug?
Also, just so I am clear, I understand your statement of "...apply an equal amount of pry to either side of the flywheel" to mean both the head and nut on the shoulder bolt. Is this correct?
Again, thank you for sharing. Working on this project has been a pleasurable learning experience. It's good to know when you've done something properly and I can't wait to get it back on the road to take the family out.
Pat
Pat, those peaned areas on the flywheel are factory. The clutch pilot tool remover does show it being pulled out. I have one of the pilot tools, and it seems to work good, but we usually have it all apart and just replace the pilot. Why I originally commented for was, while you are there, you should go ahead and remove the flywheel since you do not know if it has been sealed properly. Take 2 sufficient prybars and apply equal pressure on the back side of the flywheel to remove it. Slightly wiggle the bars back and forth to pull the flywheel off. It is best to start a nut on a stud to insure it doesn't come off and land on your toes or fingers. Also, not cause any damage to the ring gear. I hope this helps,
Peened from factory; I am surprised. However, that knowledge tells me the the pulling tool is meant to be used in conjunction with the peened assembly; good to know.
So, Doug, the rest of your comments make perfect sense and I will be following your advice. I've bought a replacement bearing, will be removing the flywheel (walking it off gently after marking its position), installing the bearing from the front side, and finally, cleaning and sealing the flywheel to crank interface upon reassembly.
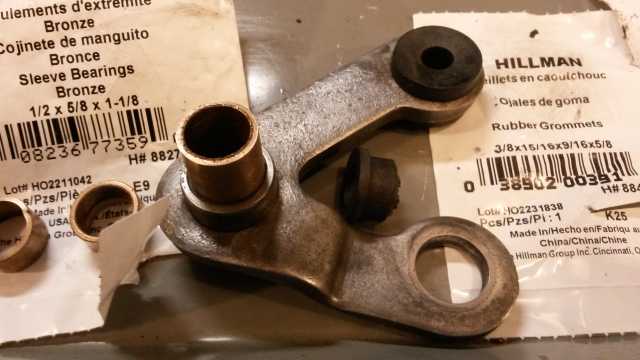
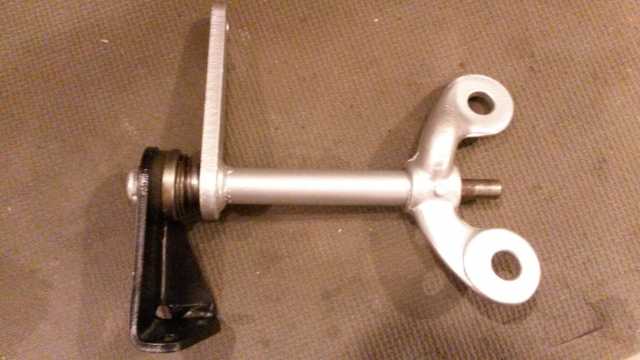
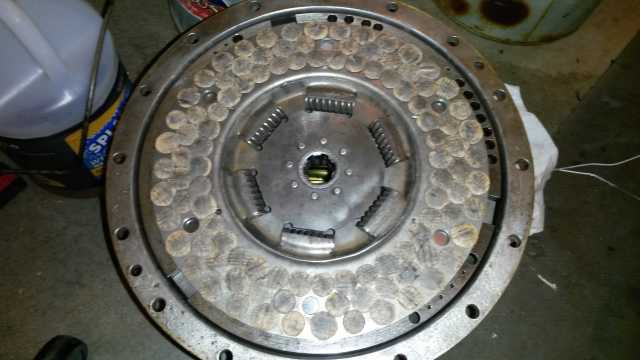
While I've got transmission out, I've also replaced the brake lines that are now accessible, replaced the rubber and bronze bushings on the shift bell crank, and repaired the worn clutch linkage shaft and bracket with new weld (as is shown by other members' posts on this forum) and replaced the rubber pieces at the interface to the bell housing. The clutch disc's dark glazing has been reduced after performing the book's recommended hot soak in solvent.
Finally, my son and I have dug away decades of the oil, grease, dirt and Midwest road gunk that have been clinging to the underside as a result of the oil leaks. In fact we've whittled a Hudson out of the 50 lbs of gunk.
I expect great drivability improvement; CAN'T WAIT.
Again, thanks Doug, for the sharing of all your experience. I plan to have the car ready for your Spring Crank Up event.
